Shrinky Dink Keychain
Make a shrinky dink keychain!
Medium: Glass
Ages: All ages with an adult
Safety Considerations: Adults should operate the toaster oven
Time: 1 hour
Description: Get inspired by glass artist Emily Kuchenbecker, who creates objects out of glass that are inspired by her relationship with nature. Use shrinky dinks, which have their own transparent quality like glass, to create a tiny object or key chain that explores your own experience with nature.
Conversation Questions: Journal about, think about or ask each other
- How do you feel when you take a walk outside?
- What natural objects are you drawn to?
- What SHAPES + COLORS do you see in these objects?

Supplies:
- Shrinky dink plastic
- Paper to draw/plan
- Sandpaper (if plastic is smooth)
- Colored pencils or Sharpies
- Scissors
- Hole punch
- Toaster oven
- Parchment paper
- Key chain
- Pliers
- Items from nature for inspiration
Steps:
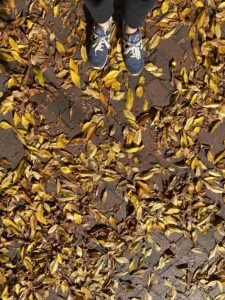
- Go on a walk and observe nature. Pick up some items or take pictures of things that make you happy. Maybe you like the colors or shapes. Maybe they give you a good feeling. Whatever it is, we will use it as inspiration, like Emily Kuchenbecker does!
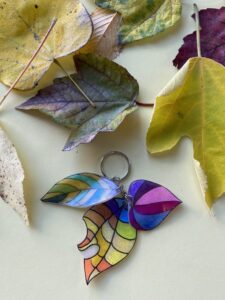
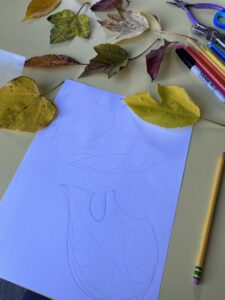
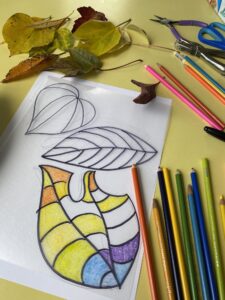
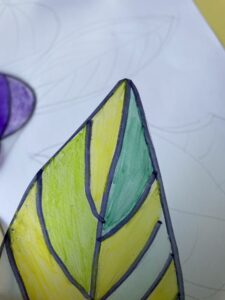
- Draw your shapes onto paper. You want to draw them pretty big because shrinky dink plastic SHRINKS! I drew three objects on one piece of paper. I used the lines within the leave to draw more basic shapes within my leaves.
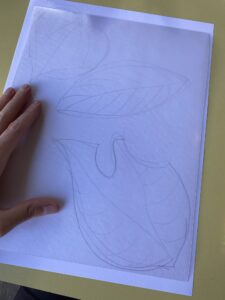
- Place a piece of shrinky dink plastic, rough side up, on top of your drawing. If your plastic is smooth and you plan on using colored pencils, rough up the plastic with some sandpaper so the colored pencil will stick.
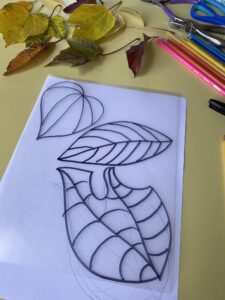
- Outline your shapes in black sharpie
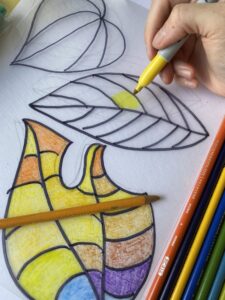
- Color in your shapes with colored pencil. This can be inspired by the colors you see on your objects, or colors that make you happy!
- You can also experiment with colorful sharpies
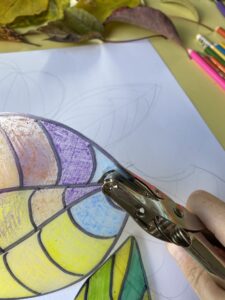
- Cut out your objects so you can still see your outlines.
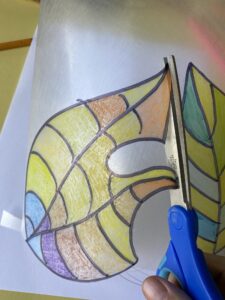
- Make sure to cut AROUND smaller sections. You don’t want to cut tiny parts because they may break later, and the plastic doesn’t like to be cut into tiny sections. Broad cutting lines are best.
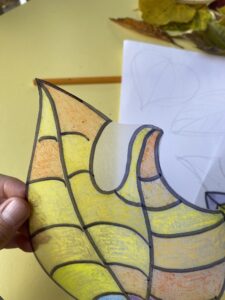
- It’s good to round your corners, so they don’t become sharp when they shrink.
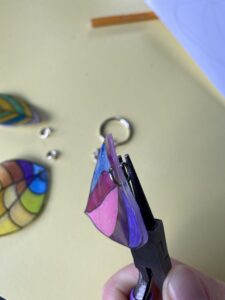
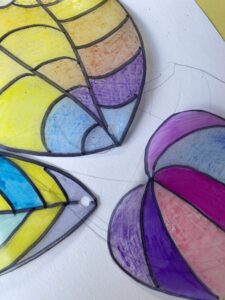
- Make sure to punch all of your holes BEFORE you put them in the oven to shrink. You can’t add them later!
- Make sure your holes aren’t too close to the edge!
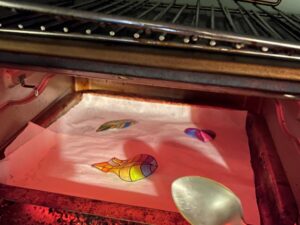
- Place some parchment paper on your toaster oven or oven tray and place your pieces, colored side up, not touching, on to the tray.
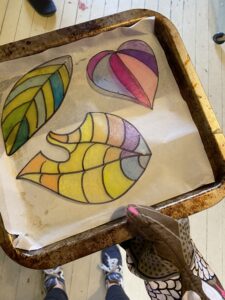
- Heat at 325 degrees for 1-3 minutes and watch them shrink! Let them go 30 seconds longer after they lay flat. You can use a metal spoon to push them down if they’re a little wobbly.
- Let them cool
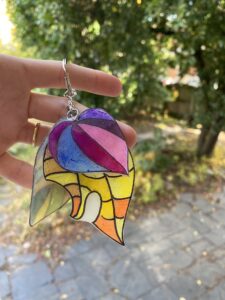
- Arrange all your pieces
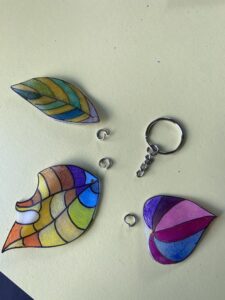
- Use pliers to attach the pieces to the keychain with jump rings